How to allocate more RAM to Minecraft?
In this post I will be teaching you how to allocate more RAM (random access memory) to Minecraft.
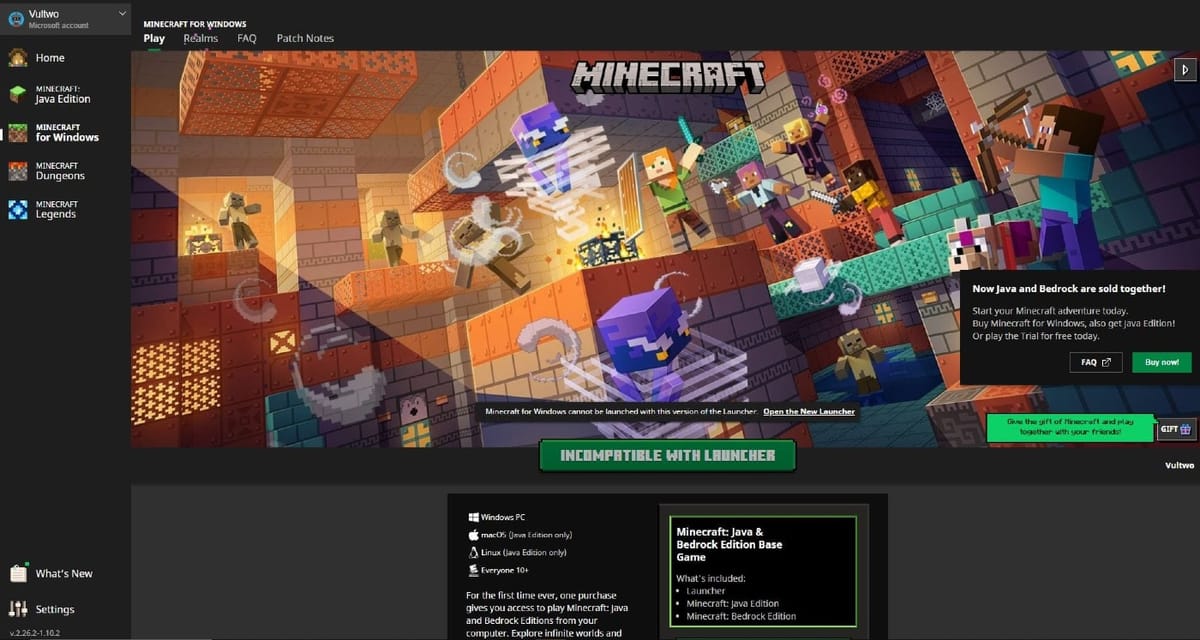
In this post I will be teaching you how to allocate more RAM (random access memory) to Minecraft. By allocating more RAM to Minecraft you will probably have a better experience with the game. Especially if you have a really large game world and have built a lot of stuff. It is also useful if you are running many mods that require a lot of resources or if you are running a large Minecraft server.
Allocate more RAM to Minecraft
As there are currently two editions of minecraft for PC I will cover both the java edition and the bedrock edition. The process for both versions of the game will be quite different though. The Java edition of the game has a set limit where as the Bedrock edition doesn't have one. The Bedrock edition can be optimized too, this requires some different steps though. To start out I will begin with the most difficult ones of the two, the Java Edition.
Java Edition
Allocating more RAM to the Java Edition of Minecraft is pretty easy if you know where to look. I have tried to make this guide as easy to follow as possible. That is why I have included multiple screenshots to guide you through the entire process.
- Open the Minecraft Launcher

- Go to the installations tab

- Edit your installation
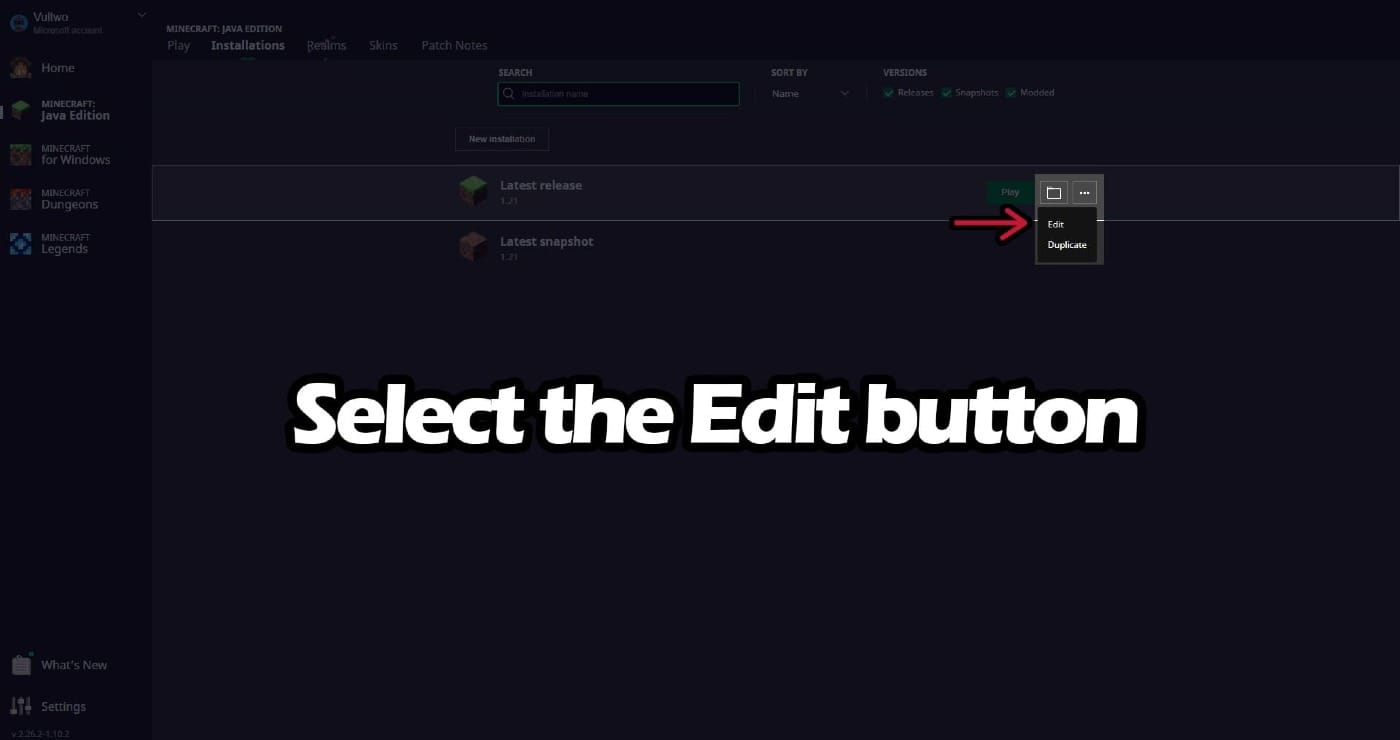
- More options

- Change the JVM Arguments
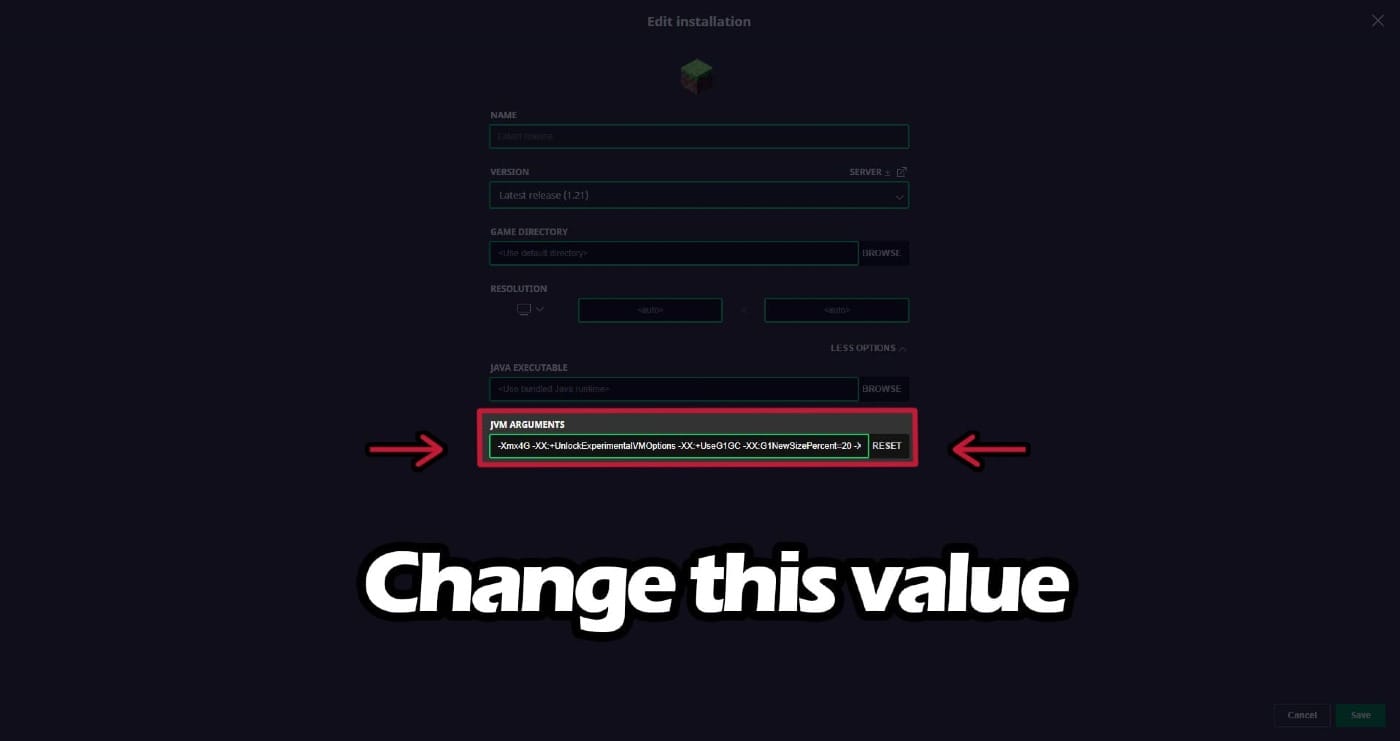
In the JVM arguments field you will notice a long line of text. This line of text needs to be edited in order to allocate more RAM to Minecraft Java Edition. The line will start with: "-Xmx2G" or similar, the 2G part specifies the maximum amount of RAM that is allocated to Minecraft.
Change this value to the desired amount of RAM. You could for example change this to 4GB, the line would become "-Xmx4G". As you can see in the screenshot, I already have 4GB allocated to my Minecraft settings, you can change this to whatever you system allows though.
Important Notes
When allocating more RAM to Minecraft there are a few things that you should keep in mind. It is possible to mess up the allocation process so here are a few important tips to keep in mind when allocating more RAM to your Minecraft installation.
Make sure not to allocate too much RAM - A general recommendation is to leave at least 2GB of RAM for the rest of your system. If you have 8GB available make sure to only allocate 6GB to Minecraft and not more. This makes sure the operating system has enough memory left to do the things it needs to do.
Allocating too much RAM can lead to decreased performance - By the way Java is designed, allocating too much RAM can lead to a bottleneck somewhere else. It is hard to say at what point the performance might decrease so this is something you will have to find out by trail and error for your system.
Bedrock Edition
Allocating more RAM to the Bedrock Edition of Minecraft is different from the Java Edition because the Bedrock Edition doesn't allow people to directly influence the amount of RAM that is being used.
There are some ways to make sure that Minecraft Bedrock Edition has enough RAM available that there shouldn't be any issues when you are playing the game.
Close Unnecessary Applications
If you like to have a lot of applications open, make sure to close them when playing the game. Especially close any web browsers that are open as they are known to consume lots and lots of RAM. Closing these applications will make sure that Minecraft Bedrock Edition automatically has more RAM available to use.
Also check some unnecessary background programs that are running by going into the windows task manager. This can help a lot too and could help you identify your performance issues better. Right click on the Windows icon in the left corner to open task manager and then click on "more details" in the left corner. Make sure to close any applications that you are not currently using there.
Increase Virtual Memory
By increasing your virtual memory you can sometimes improve the performance of the game. To do this you have to do the following, go to:
You can set a custom size for the virtual memory here. As a general rule of thumb, set the initial size of the virtual memory to 1.5 times that of your physical RAM and a maximum of 3 times your physical RAM.
Adjust Graphics Settings
This one can be a obvious one. By reducing the graphical setting of Minecraft you can save up on resources like the RAM. You should lower the settings of Render Distance, Graphics and other visual effects.
Enable Game Mode (Windows)
Windows has some built in features to optimize your games. To enable the gaming mode in Windows you should do the following:
This mode will make sure that your system allocates more resources towards the game you are playing. So this setting is not only useful for playing Minecraft!
Adjust Power Settings
If you are playing on a laptop you should enable the following feature to make sure your system gives you every drop of performance that you need. You should do the following:
I hope this helped!
In this post we went through multiple ways you can allocate more RAM to Minecraft. The process is quite straightforward, although you will have to know where to find these settings. I really hope this post has helped you go through the process of allocating more RAM to your Minecraft installation so you can enjoy the performance it offers.
Make sure to subscribe to this blog to get more helpful content like this. I will be having more Minecraft tutorials on here soon! You can subscribe by leaving your email address in the box below.

